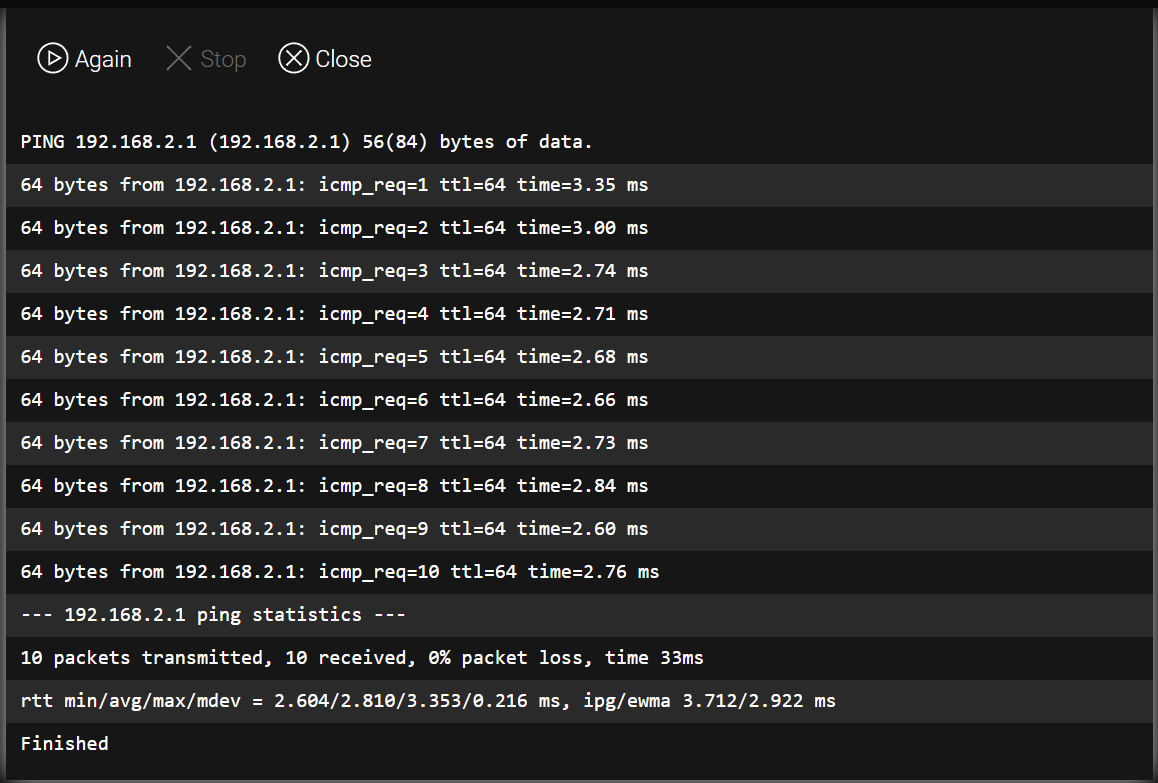
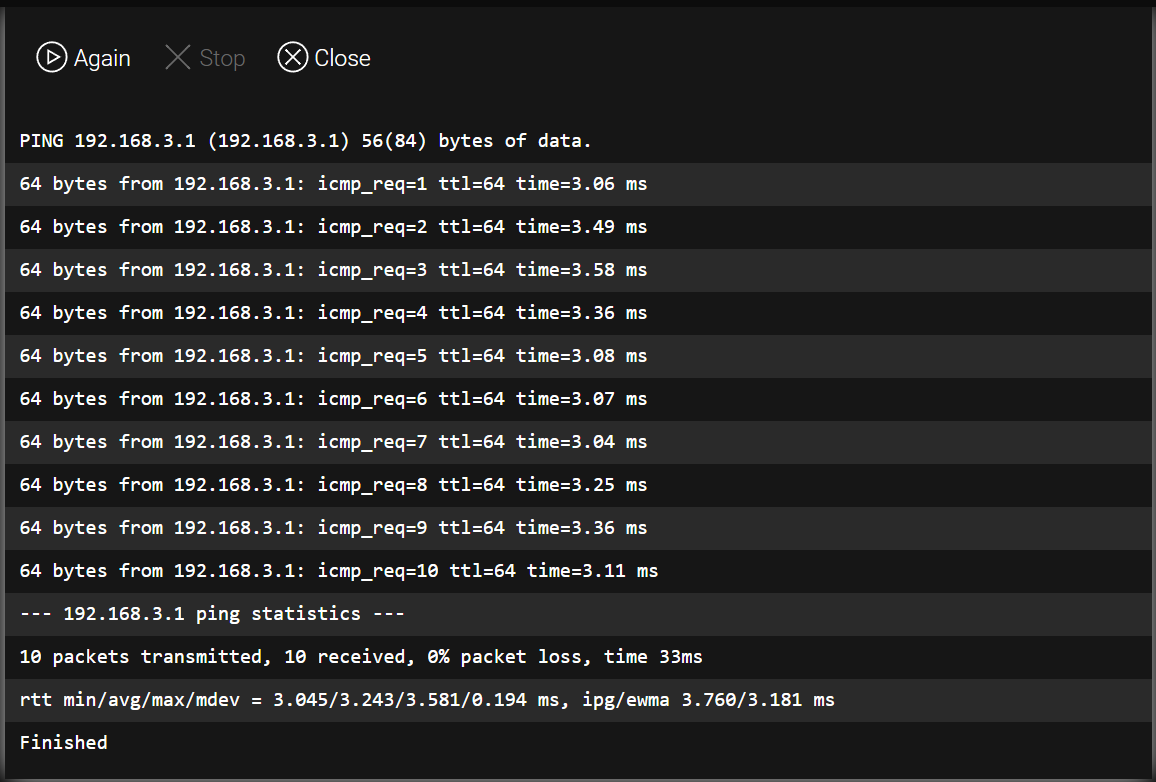
PPTP Server and Client Configuration on Donyx Routers
PPTP (Point-to-Point Tunneling Protocol) is a legacy protocol developed by Microsoft in the 1990s for establishing Virtual Private Networks (VPN). While it provides basic secure connectivity, it is widely considered insecure due to outdated encryption methods. Consequently, it is recommended to implement PPTP in conjunction with IPsec rather than as a standalone protocol.
Donyx routers support both PPTP Server and PPTP Client modes. These devices feature automatic IPsec configuration for PPTP tunnels. Note that full mutual compatibility is guaranteed only between devices running the dnxOS platform; interoperability with third-party equipment may require manual adjustment.
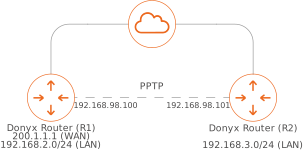
In this scenario, router R1 acts as the PPTP Server with the public IP address 200.1.1.1 and the local network 192.168.2.0/24. Router R2 acts as the PPTP Client with the local network 192.168.3.0/24.
Configuration on Router R1 (Server)
The first step in server configuration is the creation of user accounts for connecting clients.
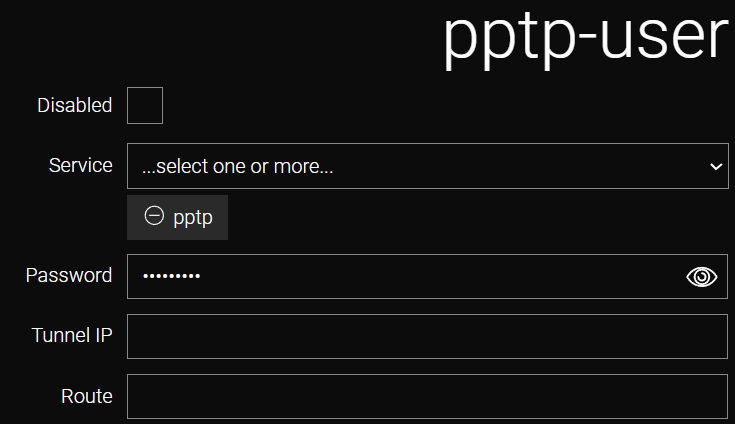
The following procedure is performed in the /service/client section:
-
Click the Add button and assign a name.
-
In the Service dropdown list, select the service for which the user is being created (e.g., pptp).
-
Specify the user password in the Password field.
-
Click Apply.
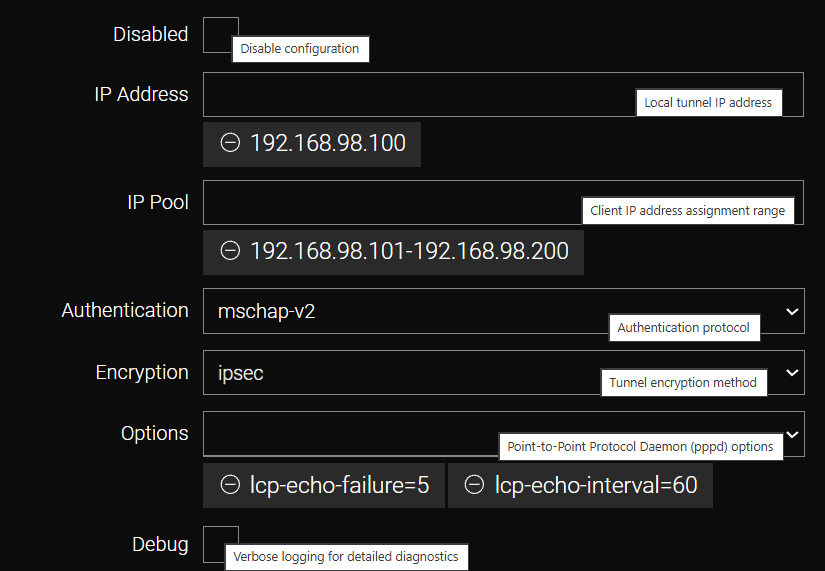
Once the account is created, navigate to the /service/pptp-server section:
-
Set the Encryption parameter to ipsec and specify the key in the Pre-Shared Key field. Other settings remain at their default values.
Configuration on Router R2 (Client)
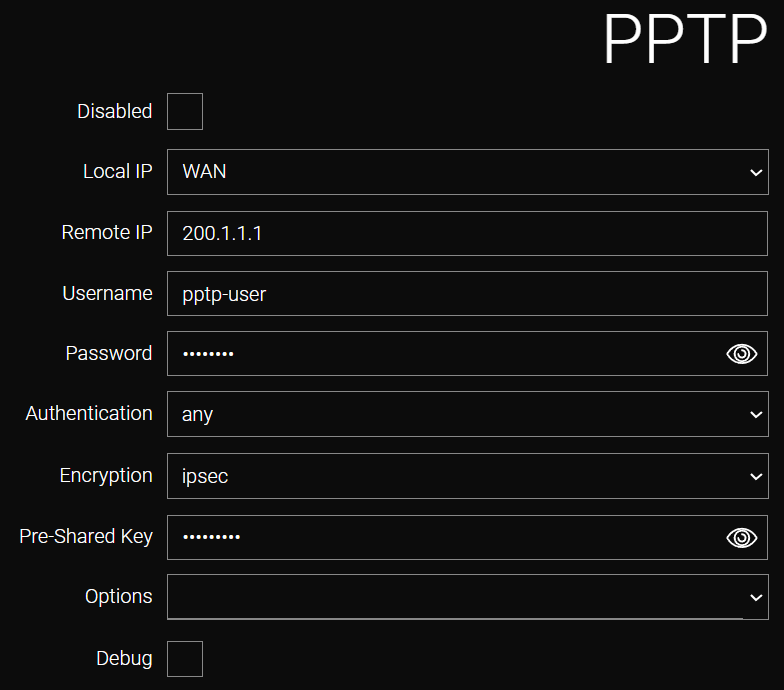
Navigate to the /tunnel/pptp section and click the Add button. Assign a name for the connection (e.g., PPTP).
The PPTP Client configuration for router R2 is illustrated in the figure below.
Field |
Value |
Local IP |
WAN (selected from the list). |
Remote IP |
200.1.1.1 (the server’s public IP address). |
User |
user (must match the username created on the server). |
Password |
(password assigned to the user). |
Encryption |
ipsec |
Pre-Shared Key |
(the secret key, must match the server configuration). |
Firewall Configuration
When the Encryption parameter is set to ipsec, no additional firewall configuration is required on the router. However, if the mmp or none options are selected, a manual rule must be created to permit incoming traffic on TCP port 1723 for the PPTP server.
The rule is created in the /firewall/filter section by clicking Add and completing the form with the following parameters:
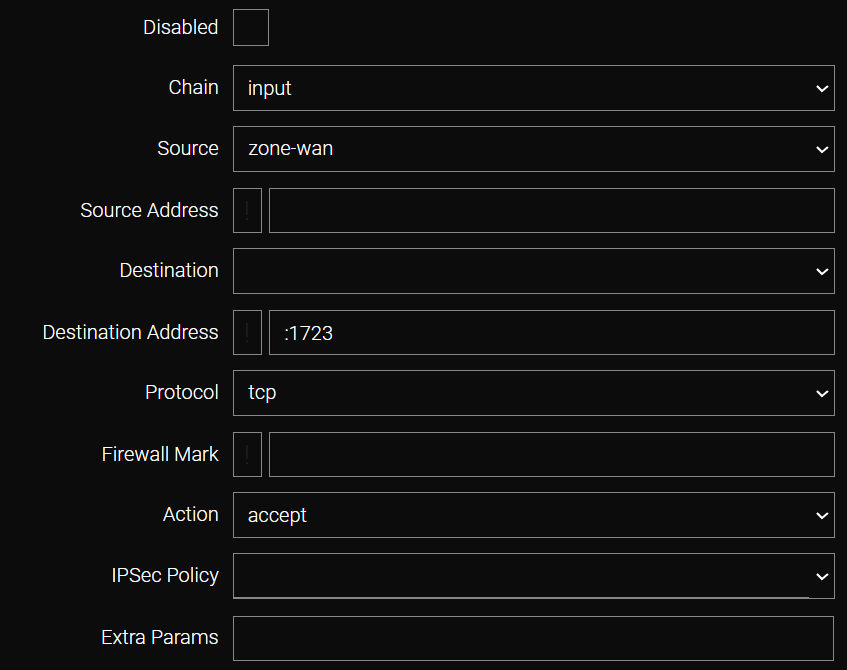
After completing the configuration, click Apply. In the /firewall/filter section, the newly created rule must be moved to the top of the list, ensuring it is positioned above any rules that deny traffic.
Configuring Routes for Local Network Access
In the /ip/route/list section, click the Add button and define the routing parameters.
Router R1 (Server)
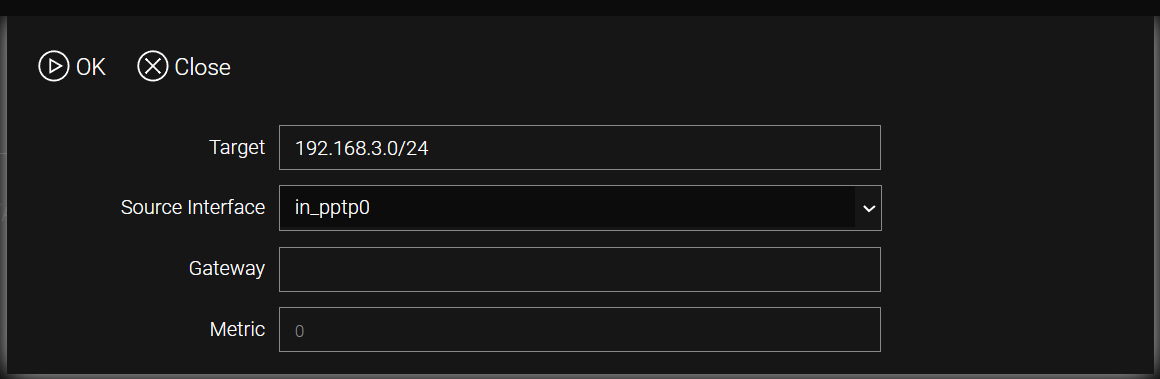
On the router acting as the server, the tunnel interface is automatically assigned the name in_pptp0.
-
In the Target field, specify the destination subnet (in this scenario, 192.168.3.0/24).
-
In the Source Interface field, manually enter the interface name: in_pptp0.
-
The Gateway field should be left blank.
-
Click OK, then click Apply.
CLI Configuration (Server)
/ip route list add dst-addr=192.168.3.0/24 interface=in_pptp0
    disabled true
    metric -
    src-addr -
    table main
    type unicast
/ip route list apply
Router R2 (Client)
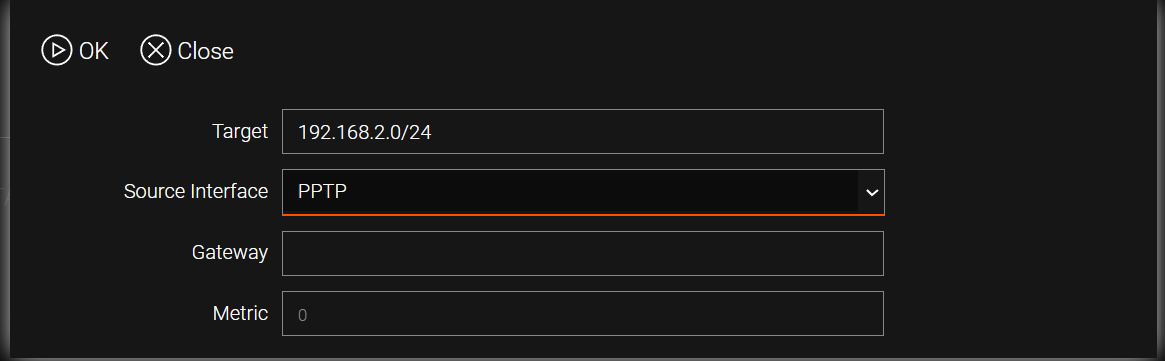
The following parameters are configured in the /ip/route/list section:
-
In the Target field, specify the destination subnet (in this scenario, 192.168.2.0/24).
-
In the Source Interface field, select the tunnel interface name (in this example, PPTP).
-
The Gateway field should be left blank.
-
Click OK, then click Apply.