OpenVPN Server and Client Configuration on Donyx Routers
Objective:
To establish a tunnel and ensure mutual connectivity between remote local networks. This configuration involves setting up one router as a server and the other as a client.
A public ("white") IP address is required only for the router acting as the server. The client router may utilize a private ("gray") IP address and can operate behind a NAT gateway.
OpenVPN Server-Client Network Topology:
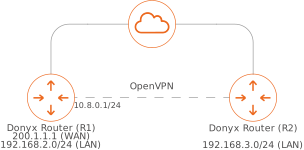
In this example, router R1 acts as the server with the public IP address 200.1.1.1 and the local network 192.168.2.0/24. The client router R2 has a local network with addresses in the 192.168.3.0/24 range.
| The configuration of OpenVPN requires the presence of valid certificates for both the client and the server on the router. For instructions on how to create, export, and import certificates in dnxOS, please refer to the dedicated article. |
Certificates may be generated using a standalone Public Key Infrastructure (PKI) (e.g., easy-rsa) or through the router’s internal interface.
Configuration for Router R1 (Server)
Navigate to the /service/openvpn-server section. An example of the server configuration is illustrated in the figure below.
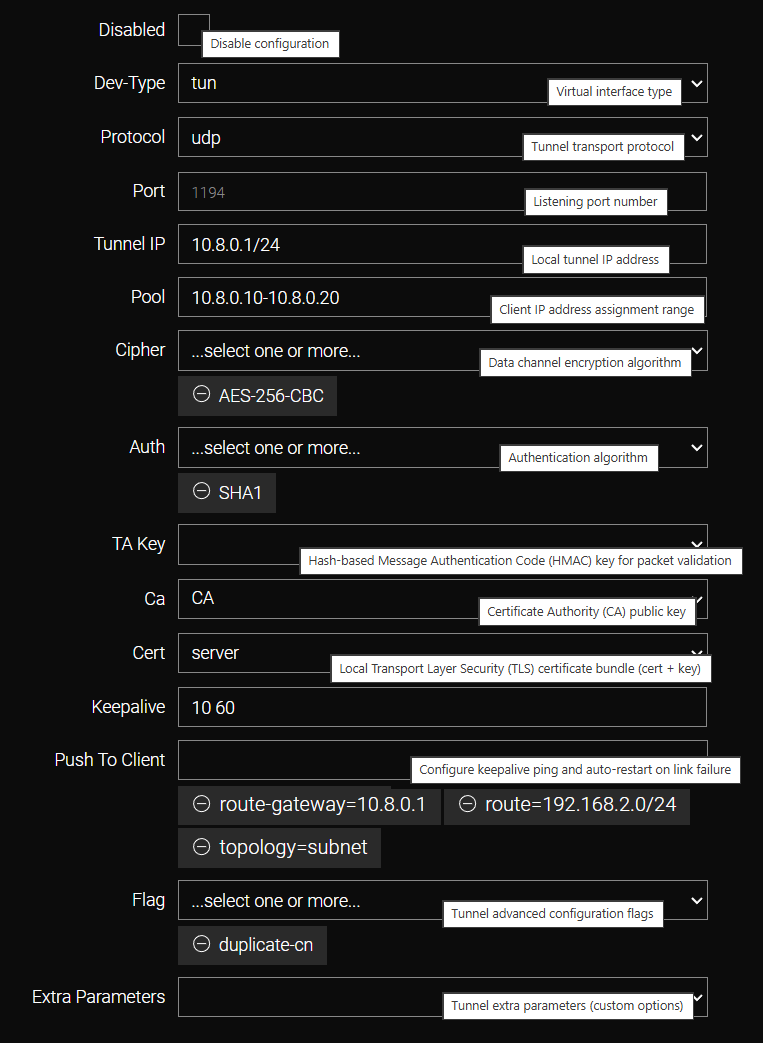
Field |
Value |
Dev-Type |
Tun |
Protocol |
UDP (default) |
Port |
1194 (default) |
Tunnel IP |
10.8.0.1/24 |
Pool |
10.8.0.10-10.8.0.20 |
Cipher |
AES-256-CBC (default) |
Auth |
SHA1 (default) |
TA Key |
(Leave blank) |
CA |
CA file name (in this example: CA) |
Cert |
Server certificate name (in this example: server) |
Keepalive |
10 60 |
Push To Client |
topology=subnet (default); |
Flag |
duplicate-cn (default) |
Click Apply to activate the configuration.
CLI Configuration (server)
| Please note that due to the requirement for pre-installed certificates, configuration via the CLI can be more complex than the web-based setup, although both interfaces utilize the same underlying parameters. |
/service openvpn-server
    auth -
    auth SHA1
    ca СA
    cert server
    cipher -
    cipher AES-256-CBC
    dev-type tun
    disabled -
    extra -
    flag -
    flag duplicate-cn
    keepalive 10 60
    pool 10.8.0.10-10.8.0.20
    port 1194
    protocol udp
    push -
    push route-gateway=10.8.0.1,route=192.168.2.0/24,topology=subnet
    ta-key -
    tunnel-ip 10.8.0.1/24

  /service openvpn-server apply
Creating a Client Account
The client account is created in the /service/client section.
-
Click the Add button.
-
Specify the Username.
| The Username must strictly match the Common Name (CN) of the certificate used by the client connecting to the OpenVPN server. |
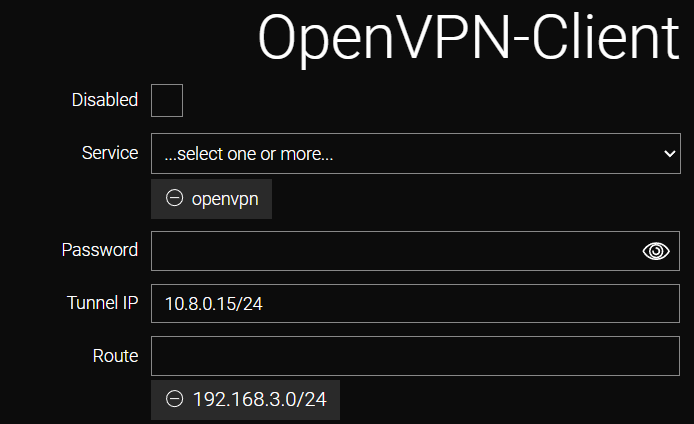
Configure the connecting client parameters:
-
In the Service field, select openvpn.
-
In the Tunnel IP field, the IP address and subnet mask (from the Pool range) can be specified for this client. If this field is left blank, the address is assigned automatically.
-
In the Route field, specify the local subnet of router R2 that should be accessible from router R1 (in this example, 192.168.3.0/24).
-
Click Apply.
If multiple unique clients need to connect to OpenVPN, corresponding entries must be created in the /service/client section with unique Usernames that match the Common Name (CN) of their respective certificates. If connectivity to the clients' local networks is required, their specific subnets must be specified in the Route field for each individual client account.
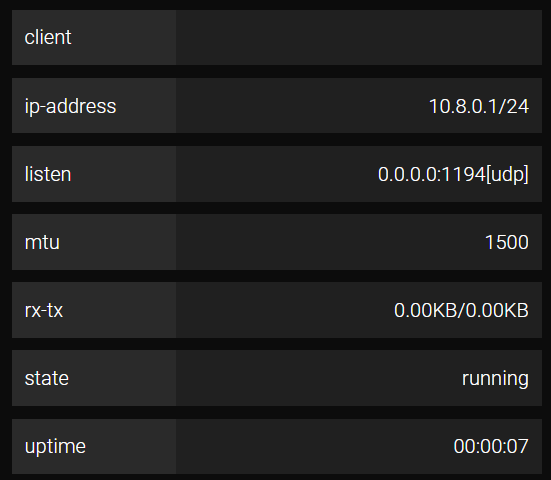
The OpenVPN Server can now be started in the /service/openvpn-server section. Uncheck the Disabled box and click Apply. The tunnel status will change to running.
Configuration for Router R2 (Client)
Navigate to the /tunnel/openvpn section. An example of the client configuration is illustrated in the figure below.
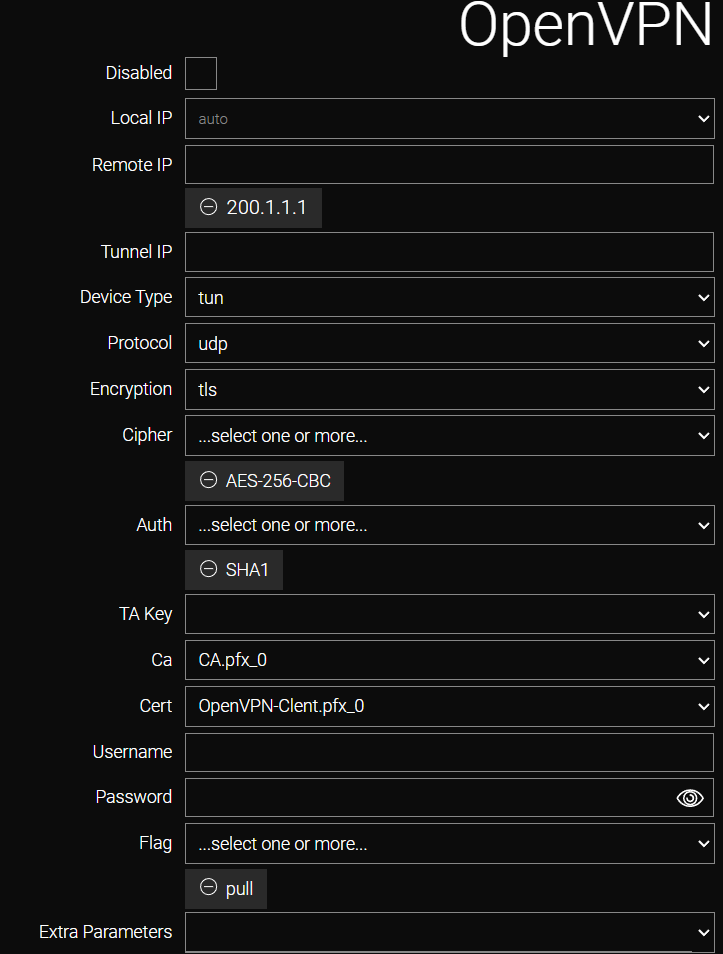
Field |
Value |
Local IP |
WAN |
Remote IP |
200.1.1.1 |
Tunnel IP |
(Leave blank) |
Device Type |
tun |
Protocol |
udp |
Encryption |
tls |
Cipher |
AES-256-CBC |
Auth |
SHA1 |
TA Key |
Not used in this example |
CA |
CA certificate filename (e.g., CA.pfx_0) |
Cert |
Client certificate filename (e.g., OpenVPN-Client.pfx_0) |
Username |
Not used in this example |
Password |
Not used in this example |
Flag |
Pull (default) |
Extra Parameters |
Not used in this example |
The CA and Cert filenames differ because they were generated on the dnxOS server and exported, which automatically modified the file identifiers.
| To import certificates onto the router, first upload the files to the /storage/file section. Then use the import function in the /storage/certificate/cert_import section. For more information, please refer to the dedicated article. |
To complete the configuration, uncheck the Disabled box and click Apply.
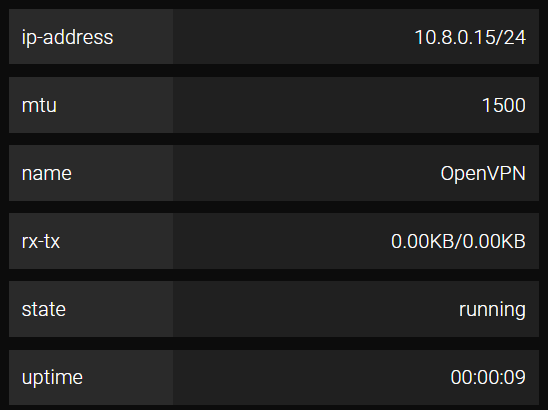
Once the tunnel is established, its status will be displayed as running:
CLI Configuration (client)
/tunnel openvpn add name=OpenVPN
    auth -
    auth SHA1
    ca ca.crt
    cert client-bundle.pem
    cipher -
    cipher AES-256-CBC
    dev-type tun
    disabled -
    encryption tls
    extra -
    flag -
    flag pull
    local-ip auto
    password -
    protocol udp
    remote-ip -
    remote-ip 200.1.1.1
    ta-key -
    tunnel-ip -
    username -
    apply
Verify that the client has received the required routes from the server by checking the routing table in the /ip/route/list section.
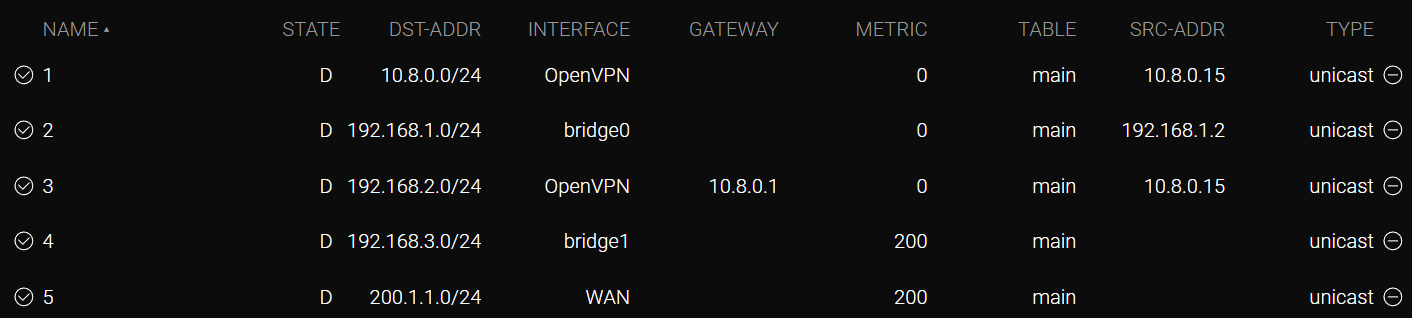
Confirm that route #1 is correctly associated with the tunnel interface and route #3 is established to the R1 local network through the tunnel interface.
| By default, all traffic for tunnel interfaces is permitted. If required, firewall rules can be configured in the /firewall/filter section. |
CLI Configuration:
admin@Router[/ip route list]>

  NAME    STATE  DST-ADDR          INTERFACE  GATEWAY        METRIC  TABLE    SRC-ADDR        TYPE
  1        D     10.8.0.0/24       OpenVPN                   0       main     10.8.0.15       unicast
  2        D     192.168.1.0/24    bridge0                   0       main     192.168.1.2     unicast
  3        D     192.168.2.0/24    OpenVPN    10.8.0.1       0       main     10.8.0.15       unicast
  4        D     192.168.3.0/24    bridge1                   200     main                     unicast
  5        D     200.1.1.0/24      WAN                       200     main                     unicast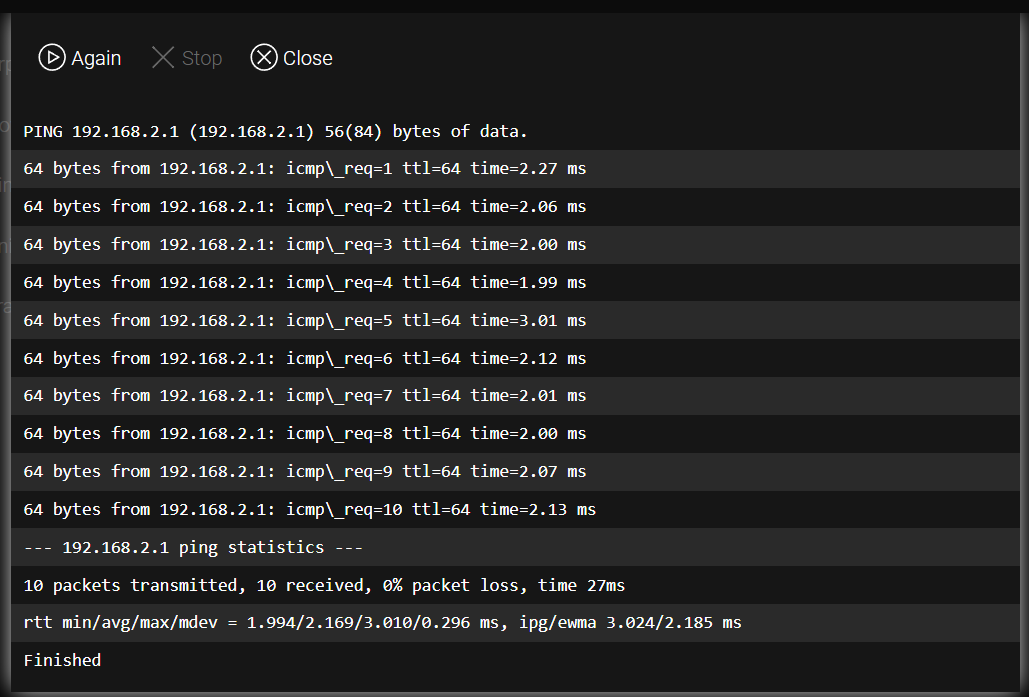
Additional Hub-and-Spoke Configuration
Currently, dnxOS does not support pushing multiple routes to clients automatically, which may require manual configuration in certain scenarios. When connecting two or more clients to an OpenVPN server with the requirement for mutual access between their local networks, the following procedure is implemented.
Assume the local network for Client #2 (router R3) is 192.168.4.0/24.
-
Create a certificate for Client #2 (router R3) on the server router R1 or via a standalone PKI system.
-
In the /service/client section of the server, create an additional client record and specify the corresponding LAN subnet in the Route field.
-
Configure the OpenVPN connection on the second client according to the standard procedure.
Upon completion, Client #2 receives the route to the server’s subnet (192.168.2.0/24) from the server. Server R1 identifies the route to the R3 subnet (192.168.4.0/24) through the Route parameter in the client record.
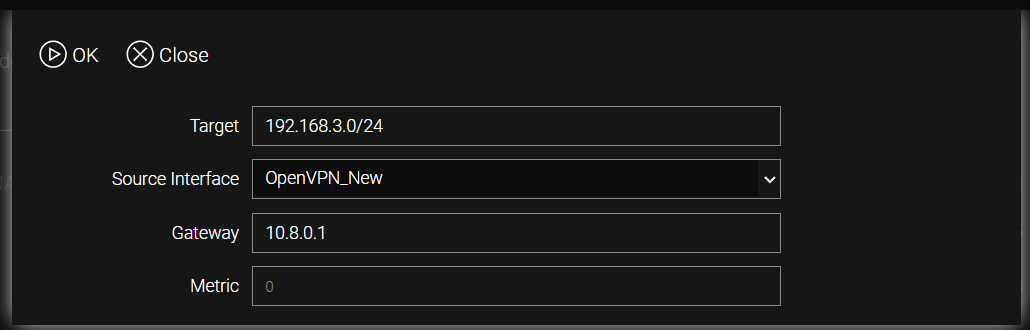
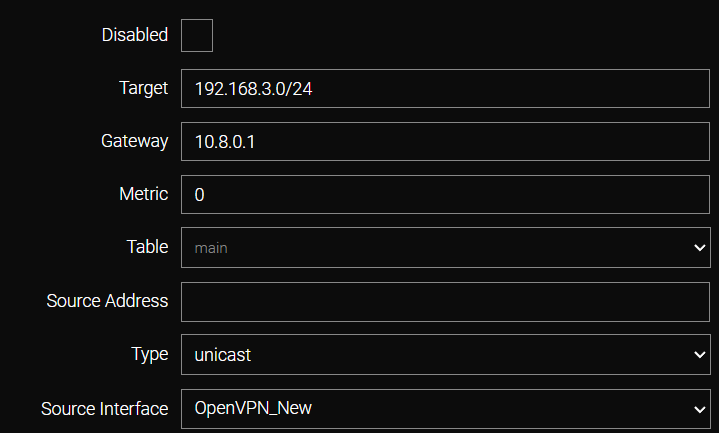
Additionally, a manual static route to the local network of Client R2 (192.168.3.0/24) must be configured on Client R3 via the OpenVPN tunnel interface, using 10.8.0.1 as the gateway.
CLI Configuration:
/ip route list add dst-addr=192.168.3.0/24 interface=OpenVPN_New
    disabled -
    gateway 10.8.0.1
    metric -
    src-addr -
    table main
    type unicast
apply-
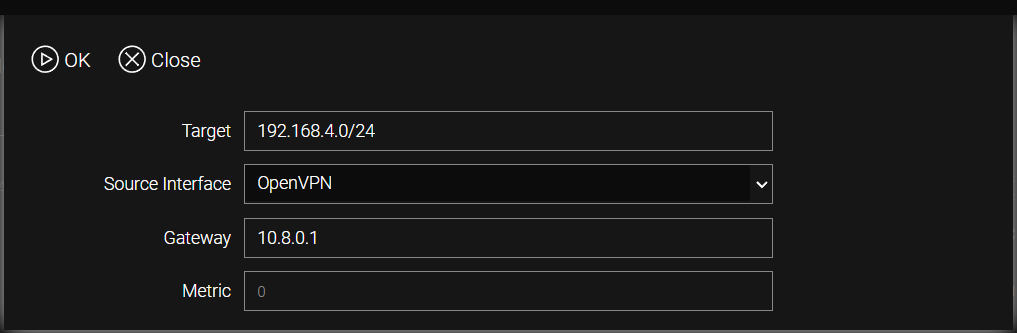
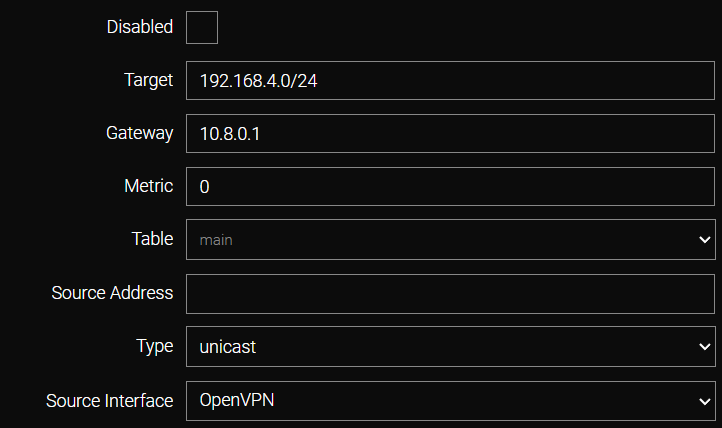
Additionally, on Client R2, a static route to the R3 network (192.168.4.0/24) must be configured via the OpenVPN interface, using 10.8.0.1 as the gateway.
CLI Configuration:
/ip route list add dst-addr=192.168.4.0/24 interface=OpenVPN
    disabled -
    gateway 10.8.0.1
    metric -
    src-addr -
    table main
    type unicast
    apply
After configuration, all three nodes and their respective local networks have full connectivity.
| All modifications are permanently saved to the router configuration only after executing the /system config commit command or clicking the commit button in the web interface. |